How to Weld Cast Iron: Preheat, Rods and Avoiding Cracks
Cast iron can be welded with nickel stick rods or brazed, if you control heat. Learn when to repair a casting, how to prep it and how to avoid cracks.
WelderGuru is reader-supported. As an Amazon Associate we earn from qualifying purchases made through links on this page, at no extra cost to you. Learn more.
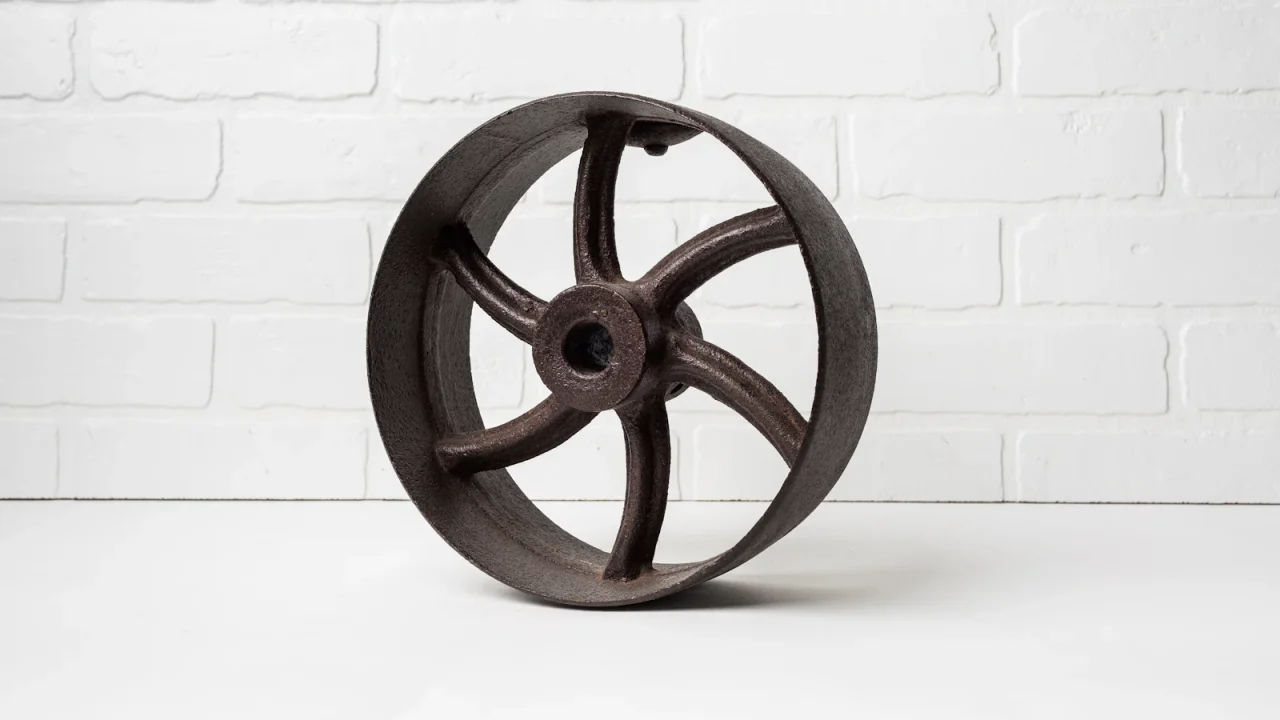
Cast iron can be welded, but it does not forgive the habits that work on mild steel. Its high carbon content makes it brittle, so the heat of an arc and the uneven cooling that follows can crack the casting right next to a weld that looks fine.
On this page
Repairs that hold up on small, non-critical castings such as brackets, vise bodies and stove parts come from three things: deciding whether the part should be welded at all, careful preparation, and strict heat control with the right filler.
Why cast iron cracks
Gray cast iron typically contains around 2 to 4 percent carbon, much of it as graphite flakes. That makes it easy to cast and machine, but brittle. Mild steel stretches a little as a weld shrinks, while cast iron cracks.
The metal beside the weld heats and cools quickly, and the carbon can form a hard, brittle zone there. The hot area also expands while the cold casting around it does not, so when the weld cools and shrinks, the stress usually ends up as a new crack along the edge of the bead. Every step below aims to reduce those temperature differences.
Decide whether it should be welded at all
Cast iron and cast steel can look alike, but cast steel welds much like ordinary steel. Two general checks help:
- Spark test: touch a grinder to an out-of-the-way spot. Gray cast iron tends to give short, dull red-orange sparks. Steel gives longer, brighter, yellow-white streams.
- File or drill test: gray cast iron files and drills into a dark gray powder or short broken chips, while steel tends to curl off in ribbons.
These are rough guides, not lab identification. Next, think about what the part does. Brazing often suits thin or decorative castings better, because it puts in far less heat. Parts that hold pressure, carry a load or affect vehicle safety should be replaced or taken to a qualified repair shop.
That rules out gas pipes and fittings, pressure vessels, pressurized pump and valve bodies, engine blocks under load, brake or steering parts and lifting gear. Oil-soaked castings give off smoke and fumes when heated, and nickel fumes need good ventilation and respiratory protection. See welding safety basics and the welding PPE checklist.
Prepare the casting
- Clean it. Grind or brush off paint, rust and grease about an inch past the repair area.
- Bake out the oil. Castings that ran in oil soak it up. Heat the area slowly with a torch until it stops smoking, cool it and clean again, outdoors or with strong ventilation.
- Find the ends of the crack. Cracks often run further than you can see. A dye penetrant kit helps show the tips.
- Drill crack-stop holes. Drill a small hole, roughly 1/8 inch, just past each end so the crack cannot run while you weld.
- Groove the crack. Grind a rounded V-groove along the crack down to sound metal. See how to use an angle grinder safely.
Hot method vs cold method
The hot method preheats the whole casting slowly and evenly, often to around 500 F, staying well below about 1,200 F, and keeps it hot through welding. It suits parts small enough to heat evenly.
The cold method keeps the casting only warm to the touch and controls heat with very short stitches and cooling time between them. It suits larger parts. Never heat just one spot of a large casting, because that alone can crack it.
Choosing a process and filler
For most home shops the practical choices are stick welding with nickel rods or brazing with an oxy-fuel torch. Nickel weld metal is ductile, so it stretches as it cools instead of cracking the casting. If stick is new to you, see the stick welding basics guide.
| Option | What it is | Best for | Trade-offs |
|---|---|---|---|
| ENi-CI stick rod | About 99% nickel | Thin sections, cleanup passes, repairs that need machining | Machines easily, but weaker than nickel-iron and usually costs more |
| ENiFe-CI stick rod | About 55% nickel, rest iron | Thicker sections and ductile iron | Stronger, but harder to machine |
| Bronze brazing with oxy-fuel | Bronze filler melts below the casting | Thin, delicate or decorative castings | Gold-colored joint; weakens at high temperatures |
| Steel MIG or flux-core wire | Ordinary steel filler | Not recommended for cast iron | Hard, brittle weld that usually cracks |
Brazing uses a bronze filler rod that melts below the iron, so the casting is heated but never melted. The oxy-fuel welding and cutting basics guide covers the equipment.
MIG or flux-core with steel wire usually fails. The steel picks up carbon from the casting, turns hard and brittle, and cracks along the edge as it cools, so the approach in MIG welding basics does not carry over.
Type to look for
Nickel cast iron welding rods
Why consider it
- Check the classification on the box: ENi-CI for pure nickel, ENiFe-CI for nickel-iron.
- Keep rods dry and follow the maker's storage advice.
Best for: Small, non-critical cast iron repairs with a stick welder
Search nickel rods (opens Amazon in a new tab)
Type-level recommendation. Compare current models, specifications and prices on Amazon. We may earn a commission.
Welding technique
Run nickel rods at the low end of their range to melt as little casting as possible. A conservative starting range for many 3/32 inch nickel rods is around 50 to 80 amps. Confirm against the rod maker’s printed range and your machine manual.
- Weld short stitches. Run beads about 1 inch long and spread them out rather than running one long bead.
- Peen while hot. Tap each bead lightly with a ball-peen hammer while it is still hot to relieve shrinkage stress.
- Control the heat. On the cold method, wait until the area is warm to the touch before the next stitch. On the hot method, keep the whole part at temperature.
- Cool slowly. Wrap the finished part in a welding blanket or bury it in dry sand. Never quench it in water or blow air on it.
Common problems and causes
| Problem | Likely cause | What to try |
|---|---|---|
| Crack beside the bead as it cools | Too much heat, long beads, or fast cooling | Shorter stitches, peening, slower cooling |
| Crack keeps growing past the repair | No crack-stop holes, or crack tips missed | Locate the tips and drill past them |
| Porosity and spatter | Oil or dirt still in the casting | Bake out oil and clean again |
| Weld too hard to file or drill | Steel filler or too much mixing with the base metal | Use ENi-CI rod at lower amperage |
| Part cracks after a quick cool-down | Quenching, drafts, or no blanket | Slow the cool-down with insulation or sand |
Most of these come back to heat control, a theme in common beginner welding mistakes.
Frequently asked questions
Can you weld cast iron with a MIG welder?
Do you have to preheat cast iron before welding?
Is brazing cast iron as strong as welding it?
Why should you not cool cast iron with water?
Sources and further reading
Keep reading
Related guides
Repair guide
How to Fix an Exhaust Pipe Without Welding: Clamps, Wraps and Sleeves
Small exhaust leaks can be patched with wraps, putty, clamps or sleeves. Learn which fix lasts, how to do it safely and…
Workshop guide
How to Use an Angle Grinder to Cut Metal Safely
Cut metal with an angle grinder safely: choose the right disc, keep the guard on, secure the work, control sparks and avoid…
Careers
Welding Careers: Training, Certification and How to Get Started
Where welders work, the main training routes, how welder certification works and the skills employers look for when you are starting out.